Mobile Application Development
Eager to learn more about software development, I was fortunate to work with Patricia Duce in order to complete an Android Developer training course and use the material contained therein to develop a course taught for the first time at UMT in Fall, 2022.
What I've Learned: Application Fundamentals
Android development has been an excellent way to get hands-on practice writing clean code and to work with software architecture patterns commonly found in industry applications, especially model-view-viewmodel ( MVVM) which is endorsed as a best practice when building Android apps.
According to Android:
Another important principle is that you should drive your UI from data models, preferably persistent models. Data models represent the data of an app. They're independent of the UI elements and other components in your app. This means that they are not tied to the UI and app component lifecycle, but will still be destroyed when the OS decides to remove the app's process from memory.
This effectively separates the application into two layers: a user-interface (UI) layer and a data layer. This concept is just one example of various design principles that I learned while exploring mobile application development.
While Android applications have historically been written in Java, Google announced in May 2019 that the officially-supported language for Android development would be Kotlin. Kotlin has much in common with Java, but its syntax has been changed to support type inference and eliminate the terminating semicolons, among many other features such as inline lambda functions, null safety, range expressions, and coroutines, all of which were explored in depth in the training course.
This course also emphasised the importance of testing application code, and each module contained an activity related to writing effective unit and functional tests. After teaching foundational concepts such as user interface (UI) management using layout resource files, click listeners, etc, the course demonstrated how to implement a Recycler View. Recycler Views are the component inside of Android applications that allow for an infinitely scrollable list. Think of any 'feed' you have encountered such as news feed on LinkedIn or Twitter, and you have the idea. Recycler Views have been designed to provide a user-friendly experience by scrolling smoothly and not freezing or jerking as fresh list items are loaded into the list.
The following is a code snippet from my application ListMaker which demonstrates the use of a Recycler View. Its individual components will be explained below:
- The MainAdapter class constructor expects as arguments two click listeners that determine what occurs if a list item is clicked or long-clicked, respectively, and extends the ListAdapter class which expects a DifCallback object as an argument.
- ListAdapter is a base class used for presenting list data in a Recycler View.
- DiffCallback is a class that contains methods for computing the difference between two lists and is useful to detect when only one or a few list elements have changed, and update only those elements, as opposed to the entire list. Here DiffCallback is implemented as a companion object.
- A companion object is an example of the Singleton design pattern and also resembles static objects in Java in the sense that they belong to a specific class but not a given instance of that class.
-
The
ViewHolderclass accepts aListItemBindingobject as an argument. AListItemhas been defined in a separate xml file and in this case contains only instructions on how to display a text field. TheViewHolderclass is responsible for using this binding object to set the text field of a given list item to the appropriate item's name in thebindfunction. -
The
onCreateViewHolderfunction returns aViewHolderand is responsible for inflating theListItemview. -
Additionally, two click listeners are set within
onCreateViewHolder. Additional listeners can be set here as well that handle the application's response to specific gestures or other events. -
Lastly, the
onBindViewHolderfunction is responsible for performing the work defined inonCreateViewHolderand, therefore, also any work defined in thebindfunction in theViewHolderconstructor. In this case, this entails setting aListItem's text field to the appropriate item's name and setting two click listeners.
class MainAdapter(
    private val onItemClick: (MainItem) -> Unit, private val onItemLongClick: (MainItem) -> Boolean
) : ListAdapter(DiffCallback) {

    companion object DiffCallback : DiffUtil.ItemCallback() {
        override fun areItemsTheSame(oldItem: MainItem, newItem: MainItem): Boolean {
            return oldItem.itemName == newItem.itemName
        }

        override fun areContentsTheSame(oldItem: MainItem, newItem: MainItem): Boolean {
            return oldItem == newItem
        }

    }

    class ViewHolder(private var binding: ListItemBinding) : RecyclerView.ViewHolder(binding.root) {
        fun bind(item: MainItem) {
            binding.listItemText.text = item.itemName.toString()
        }
    }

    override fun onCreateViewHolder(parent: ViewGroup, viewType: Int): ViewHolder {
        val viewHolder = ViewHolder(
            ListItemBinding.inflate(
                LayoutInflater.from(parent.context),
                parent,
                false
            )
        )
        viewHolder.itemView.setOnClickListener {
            val position = viewHolder.adapterPosition
            onItemClick(getItem(position))
        }
        viewHolder.itemView.setOnLongClickListener {
            val position = viewHolder.adapterPosition
            onItemLongClick(getItem(position))
        }
        return viewHolder
    }

    override fun onBindViewHolder(holder: ViewHolder, position: Int) {
        holder.bind(getItem(position))
    }
}
What I've Learned: Application Navigation
Android provides a
Navigation
Component
which is intended to simply the process of navigating between views within an application.
In
Android,
any screen displayed to a user is a view that has been defined in a layout.xml
file.
These
views can
be either activities or fragments. Simple applications can usually be contained within a
single
activity
and make use of fragments to display different views. Utilizing the Navigation Component in
such
a
situation is described below. The code for these examples has been taken from my solution to
a
project
in the third module of the Android
Basics in Kotlin
course:
-
Android applications have their programmatic entry point located in a
MainActivityclass (this can be modified in theAndroidManifest.xmlfile, but changing this doesn't appear to be a common practice). WithinMainActivitywe can initialize aNavHostFragment, which is a fragment that will be used to display the views contained within our app. This fragment is owned by theNavHost, which contains the context for navigating using aNavController. We also initialize thisNavControllerwithinMainActivity. These steps are demonstrated in the code below:class MainActivity : AppCompatActivity() { private lateinit var navController: NavController override fun onCreate(savedInstanceState: Bundle?) { super.onCreate(savedInstanceState) setContentView(R.layout.activity_main) val navHostFragment = supportFragmentManager .findFragmentById(R.id.nav_host_fragment) as NavHostFragment navController = navHostFragment.navController setupActionBarWithNavController(navController) } } -
Next, a
navGraph.xmlis necessary in order to define the fragments known to theNavHostand define both the directionality between fragments and their corresponding layout files: -
Now click listeners must be incorporated into each fragment that will trigger the
appropriate
transition from one view to another:
class StartOrderFragment : Fragment() {
    private var _binding: FragmentStartOrderBinding? = null
    private val binding get() = _binding!!

    override fun onCreateView(
        inflater: LayoutInflater,
        container: ViewGroup?,
        savedInstanceState: Bundle?
    ): View? {
        _binding = FragmentStartOrderBinding.inflate(inflater, container, false)
        val root: View = binding.root
        // Navigate to entree menu
        binding.startOrderBtn.setOnClickListener { // Setting the click listener to call navigation action
            findNavController().navigate(R.id.action_startOrderFragment_to_entreeMenuFragment)
        }
        return root
    }
}
These steps demonstrate the implementation of code directly related to the Navigation
Component,
but
it
is
worth noting that additional steps are necessary, such as placing a
FragmentContainerView
inside the MainActivity layout file, as well as defining the layout files for
each
individual fragment. (This app also makes use of a ViewModel, but this will be
discussed
in another section). Once all this has been finished, we can navigate through the
application as
demonstrated below:
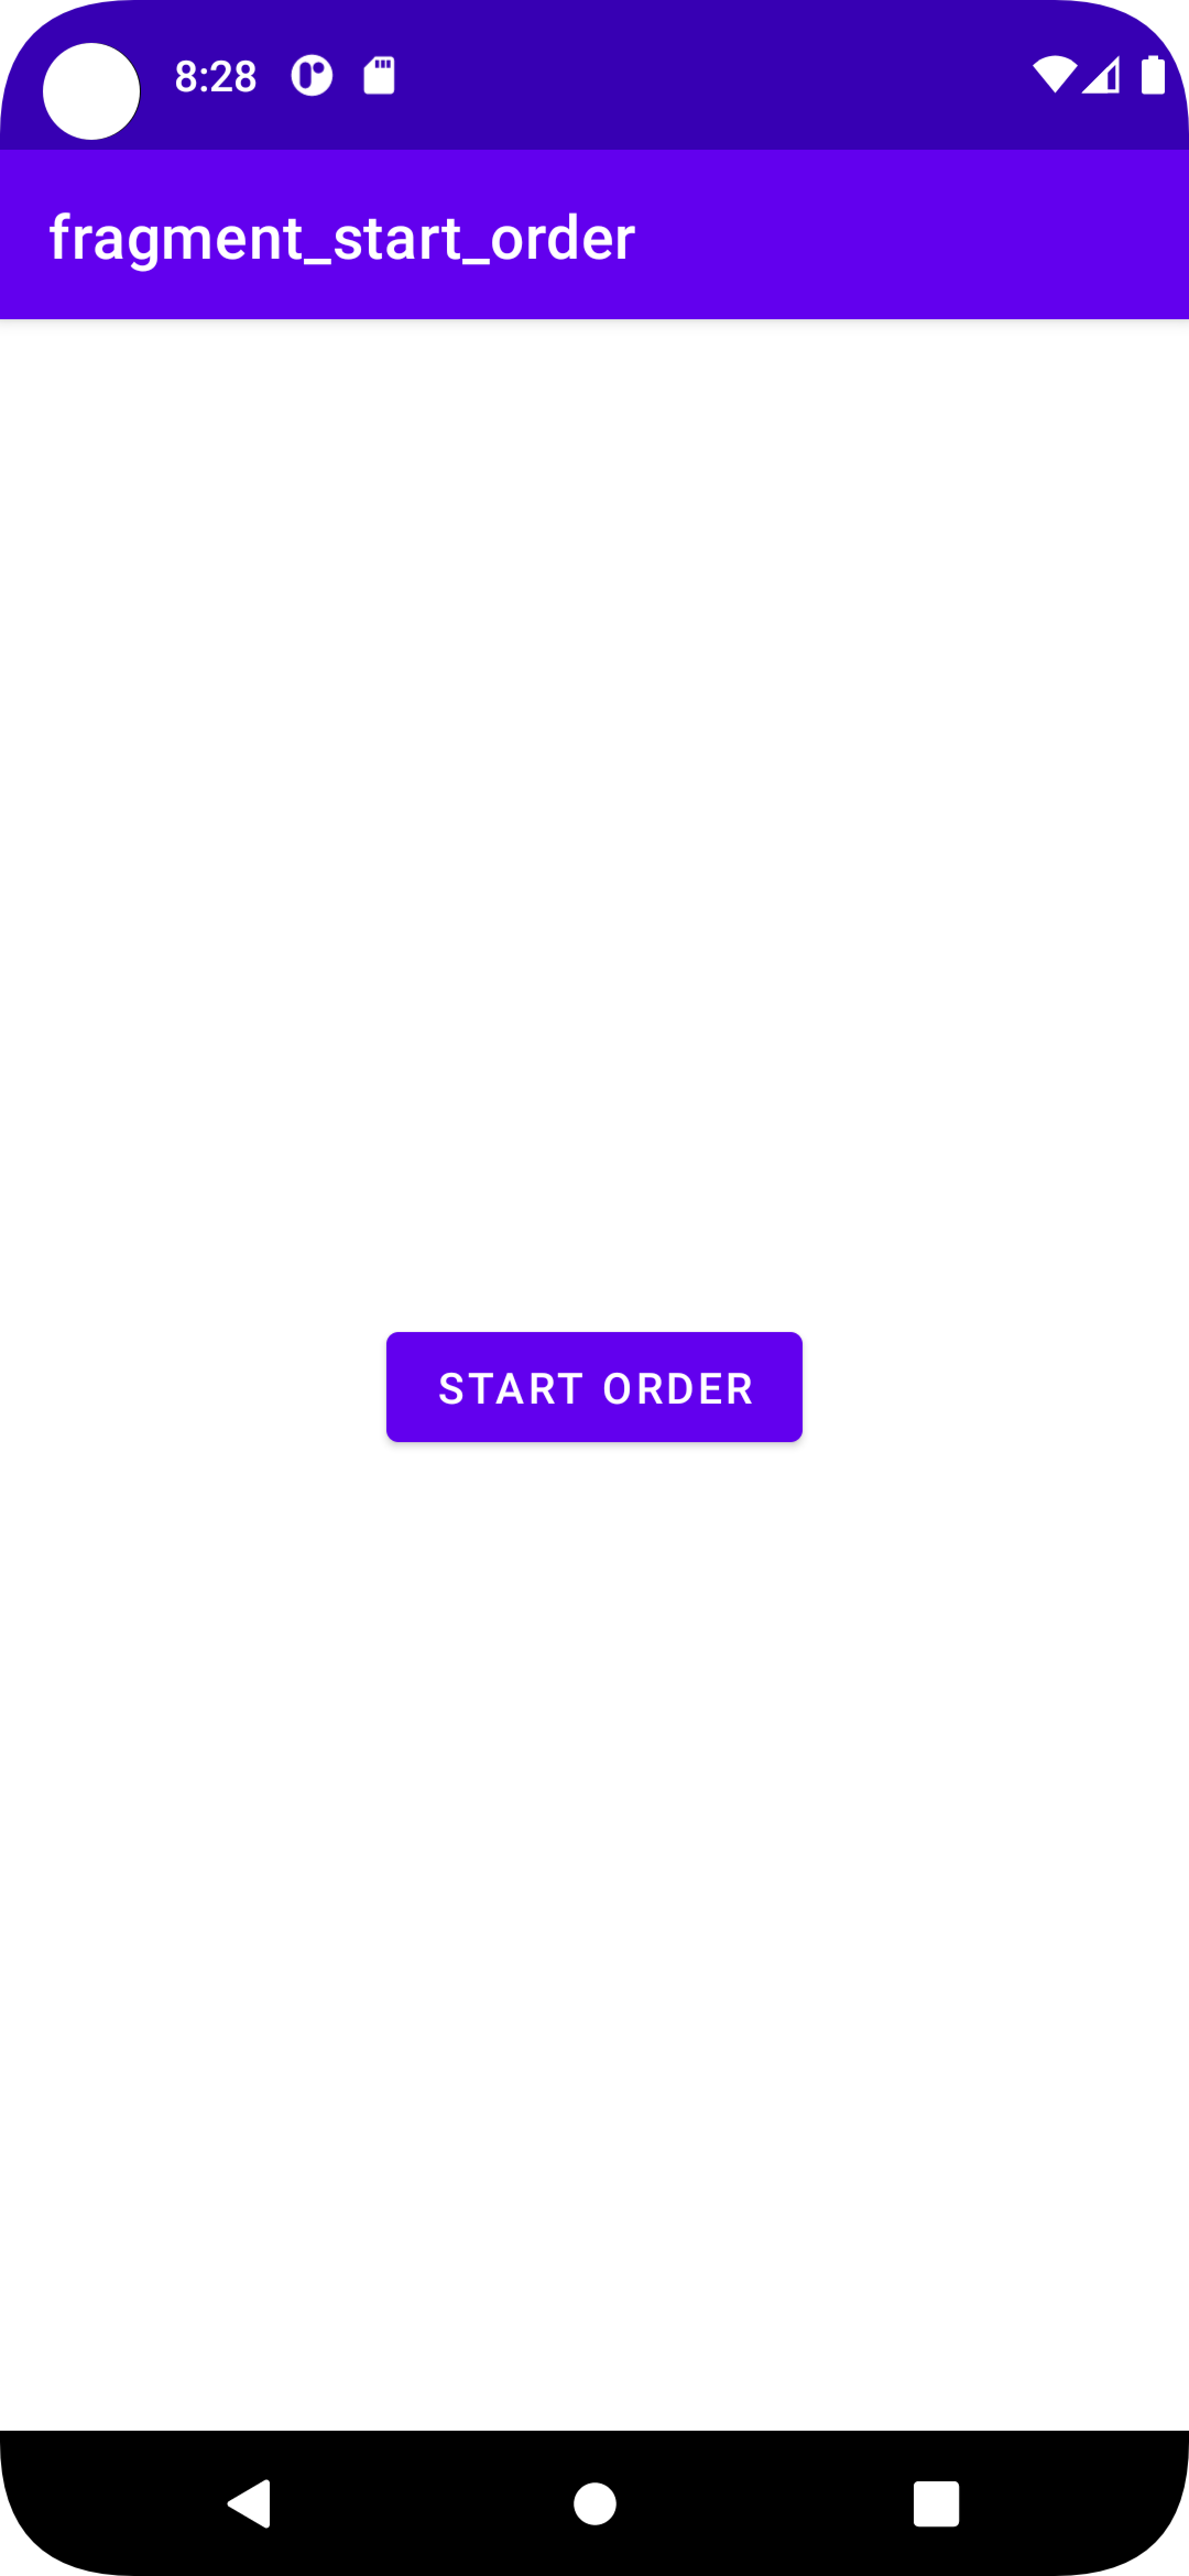
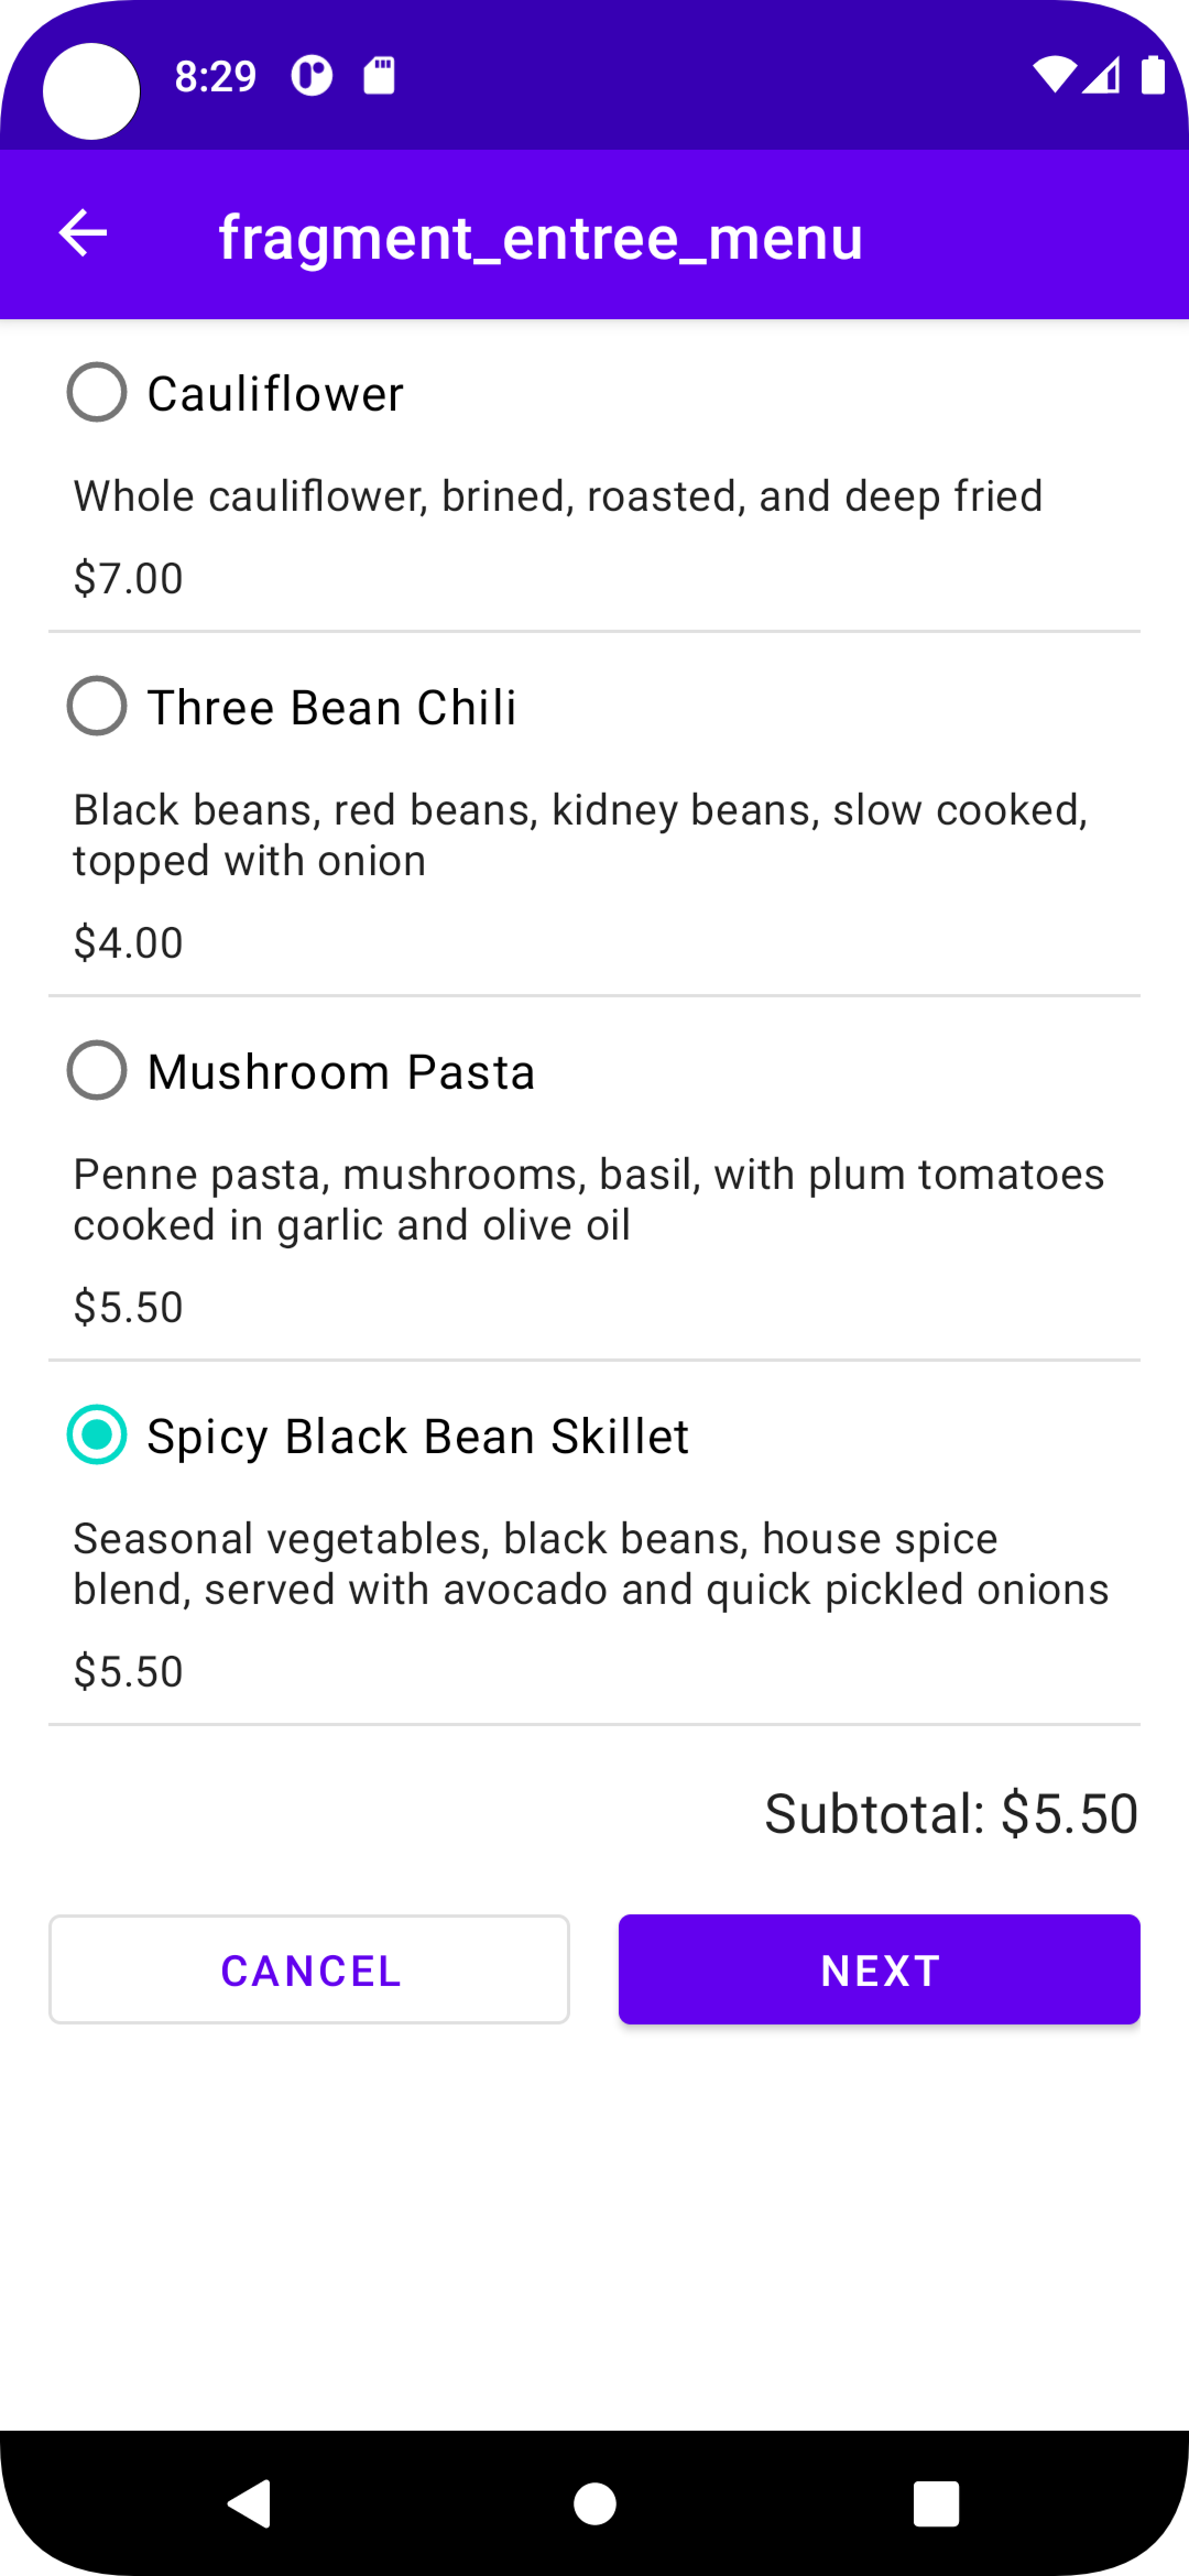

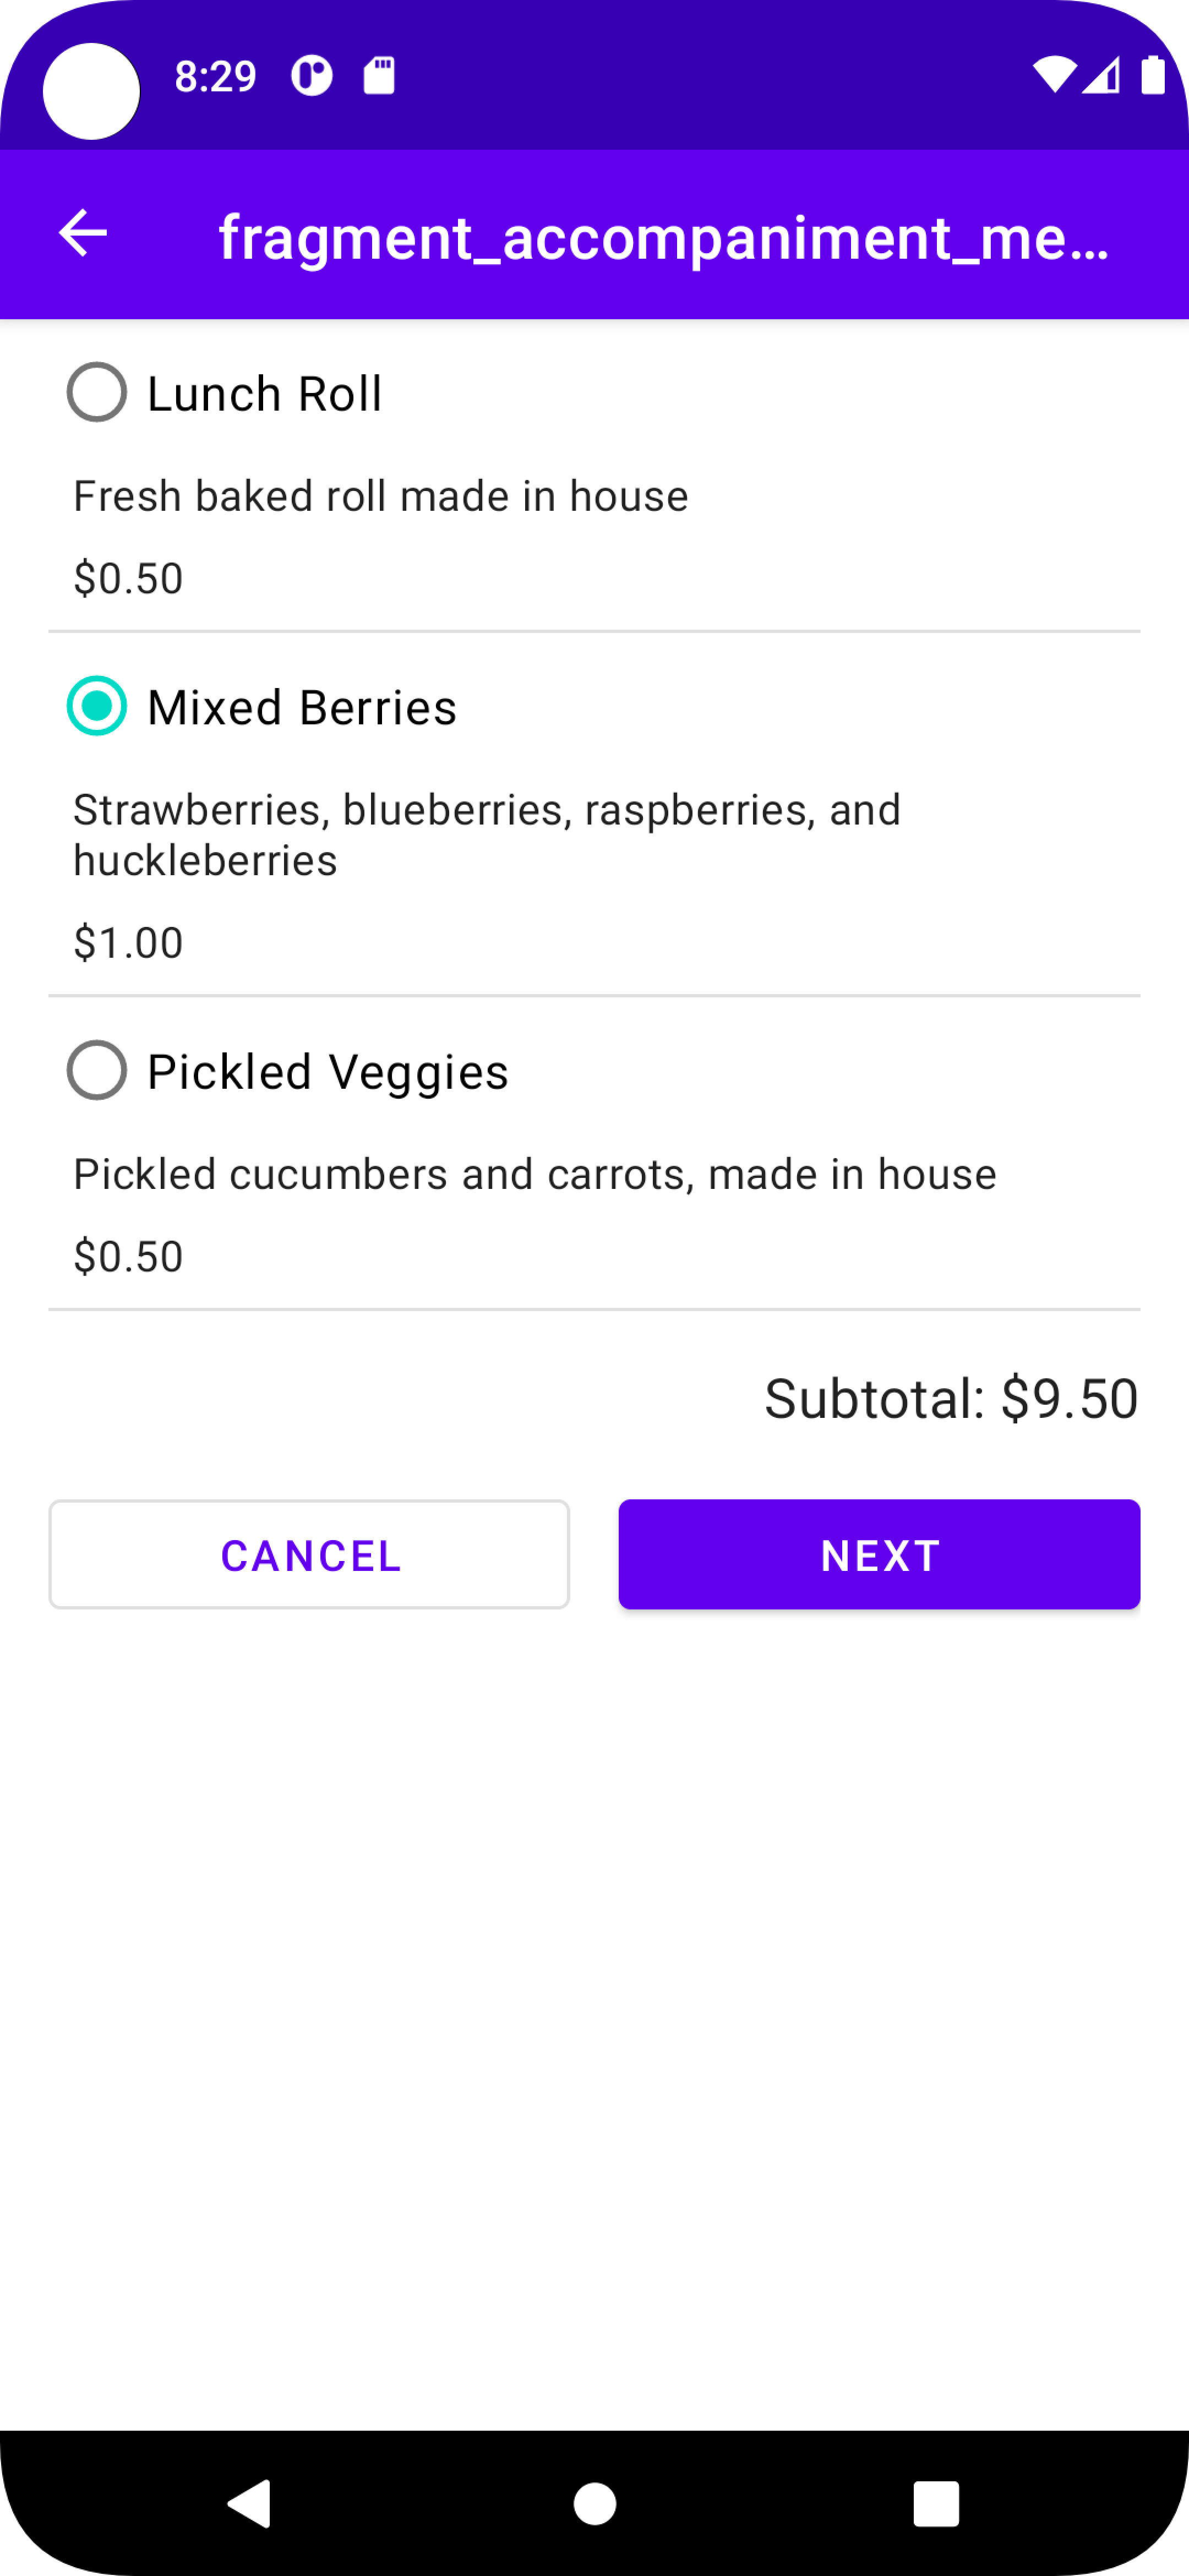
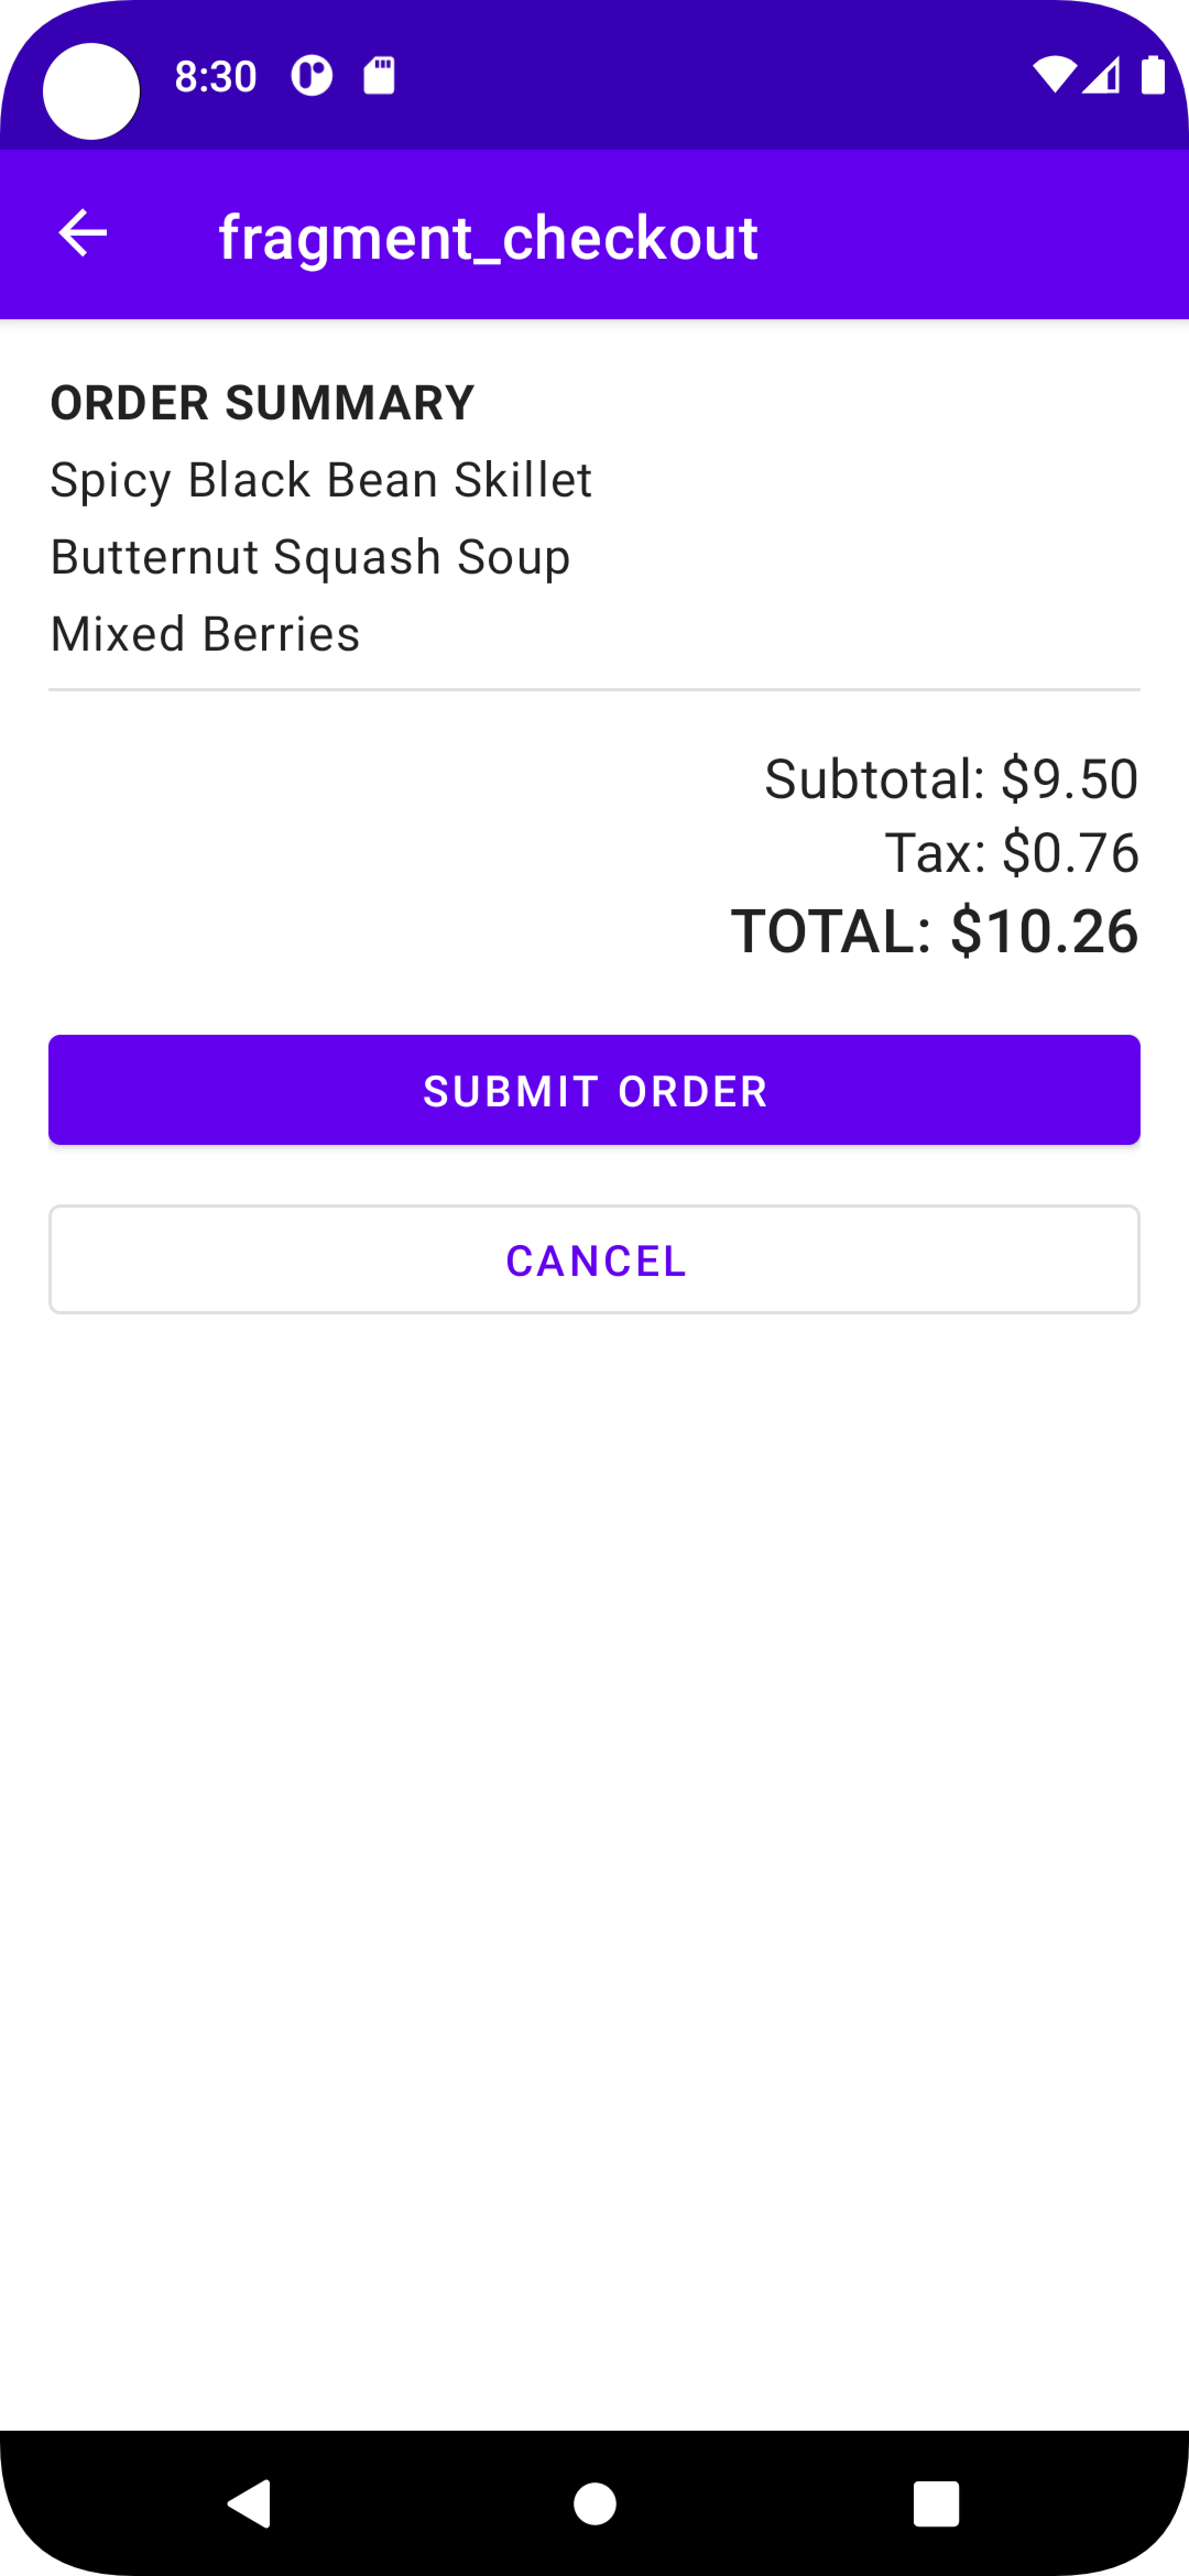
Clicking the back arrow located in the AppBar at the top of the screen will result in a navigation action that displays the previously shown fragment.
What I've Learned: ViewModels and MVVM Architecture
In Android a ViewModel is used to store application data in a way that respects the Android application lifecycle. If data were to be stored local to a given activity or fragment, this data could be lost for any number of reasons out of the control of the application user or programmer, such as rotating the device screen, the operating system re-allocating memory resources, and the activity or fragment losing focus. Additionally, ViewModels simplify the process of sharing data between fragments. Separating application data from the user-interface is a common pattern in commercial codebases.
To explore the implementation of a ViewModel, I have copied code from my solution to the Cupcake codelab. Implementing a ViewModel within an application begins by simply declaring a new class that extends the ViewModel base class:
class OrderViewModel : ViewModel() { }
Next, we define fields for our OrderViewModel class. There is a convention when
doing
this
in Kotlin termed the backing property, which holds that a mutable private variable is
accessed
by any functions within the OrderViewModel class and an immutable public
variable
is
then
provided for other classes
to access. This is similar in theory to using getters and setters in Java. The example below
uses
LiveData
types:
     private val _quantity = MutableLiveData()
    val quantity: LiveData = _quantity

    private val _flavor = MutableLiveData()
    val flavor: LiveData = _flavor

    private val _date = MutableLiveData()
    val date: LiveData = _date

    private val _price = MutableLiveData()
    val price: LiveData = Transformations.map(_price) {
        NumberFormat.getCurrencyInstance().format(it)
    }
The following function definitions demonstrate how the private immutable variables are used
within
the OrderViewModel class:
    fun setQuantity(numberCupcakes: Int) {
        _quantity.value = numberCupcakes
        updatePrice()
    }

    fun setFlavor(desiredFlavor: String) {
        _flavor.value = desiredFlavor
    }

    fun setDate(pickupDate: String) {
        _date.value = pickupDate
        updatePrice()
    }

    fun hasNoFalvorSet(): Boolean {
        return _flavor.value.isNullOrEmpty()
    }

    private fun updatePrice() {
        var calculatedPrice = (quantity.value ?: 0) * PRICE_PER_CUPCAKE
        if (dateOptions[0] == _date.value) {
            calculatedPrice += PRICE_FOR_SAME_DAY_PICKUP
        }
        _price.value = calculatedPrice
    }
Now that our OrderViewModel is implemented, we can access its fields and
methods
from
within our application. The following example demonstrates accessing
OrderViewModel
from the fragment StartFragment:
-
activityViewModels()is called to return access to anOrderViewModelinstance shared between all fragments in the activity. The reference to this instance is declared in a variablesharedViewModel. -
The methods defined in
OrderViewModelcan be accessed in order to update the value of the fields such as quantity and flavor.
class StartFragment : Fragment() {

    private val sharedViewModel: OrderViewModel by activityViewModels()

    ...

    // Begin a cupcake order by setting number of cupcakes and their flavor
    fun orderCupcake(quantity: Int) {
        sharedViewModel.setQuantity(quantity)
        if (sharedViewModel.hasNoFalvorSet()) {
            sharedViewModel.setFlavor(getString(R.string.vanilla))
        }
        findNavController().navigate(R.id.action_startFragment_to_flavorFragment)
    }
}
Implementing a ViewModel is very straightforward and provides an easy way for fragments
to
access data that they have a common interest in. It also avoids numerous problems that can occur
when
code
corresponding to the user interface stores application data.
What I've Learned: Retrieving Data from the Internet
Most mobile applications perform network requests in order to retrieve and display
information
to
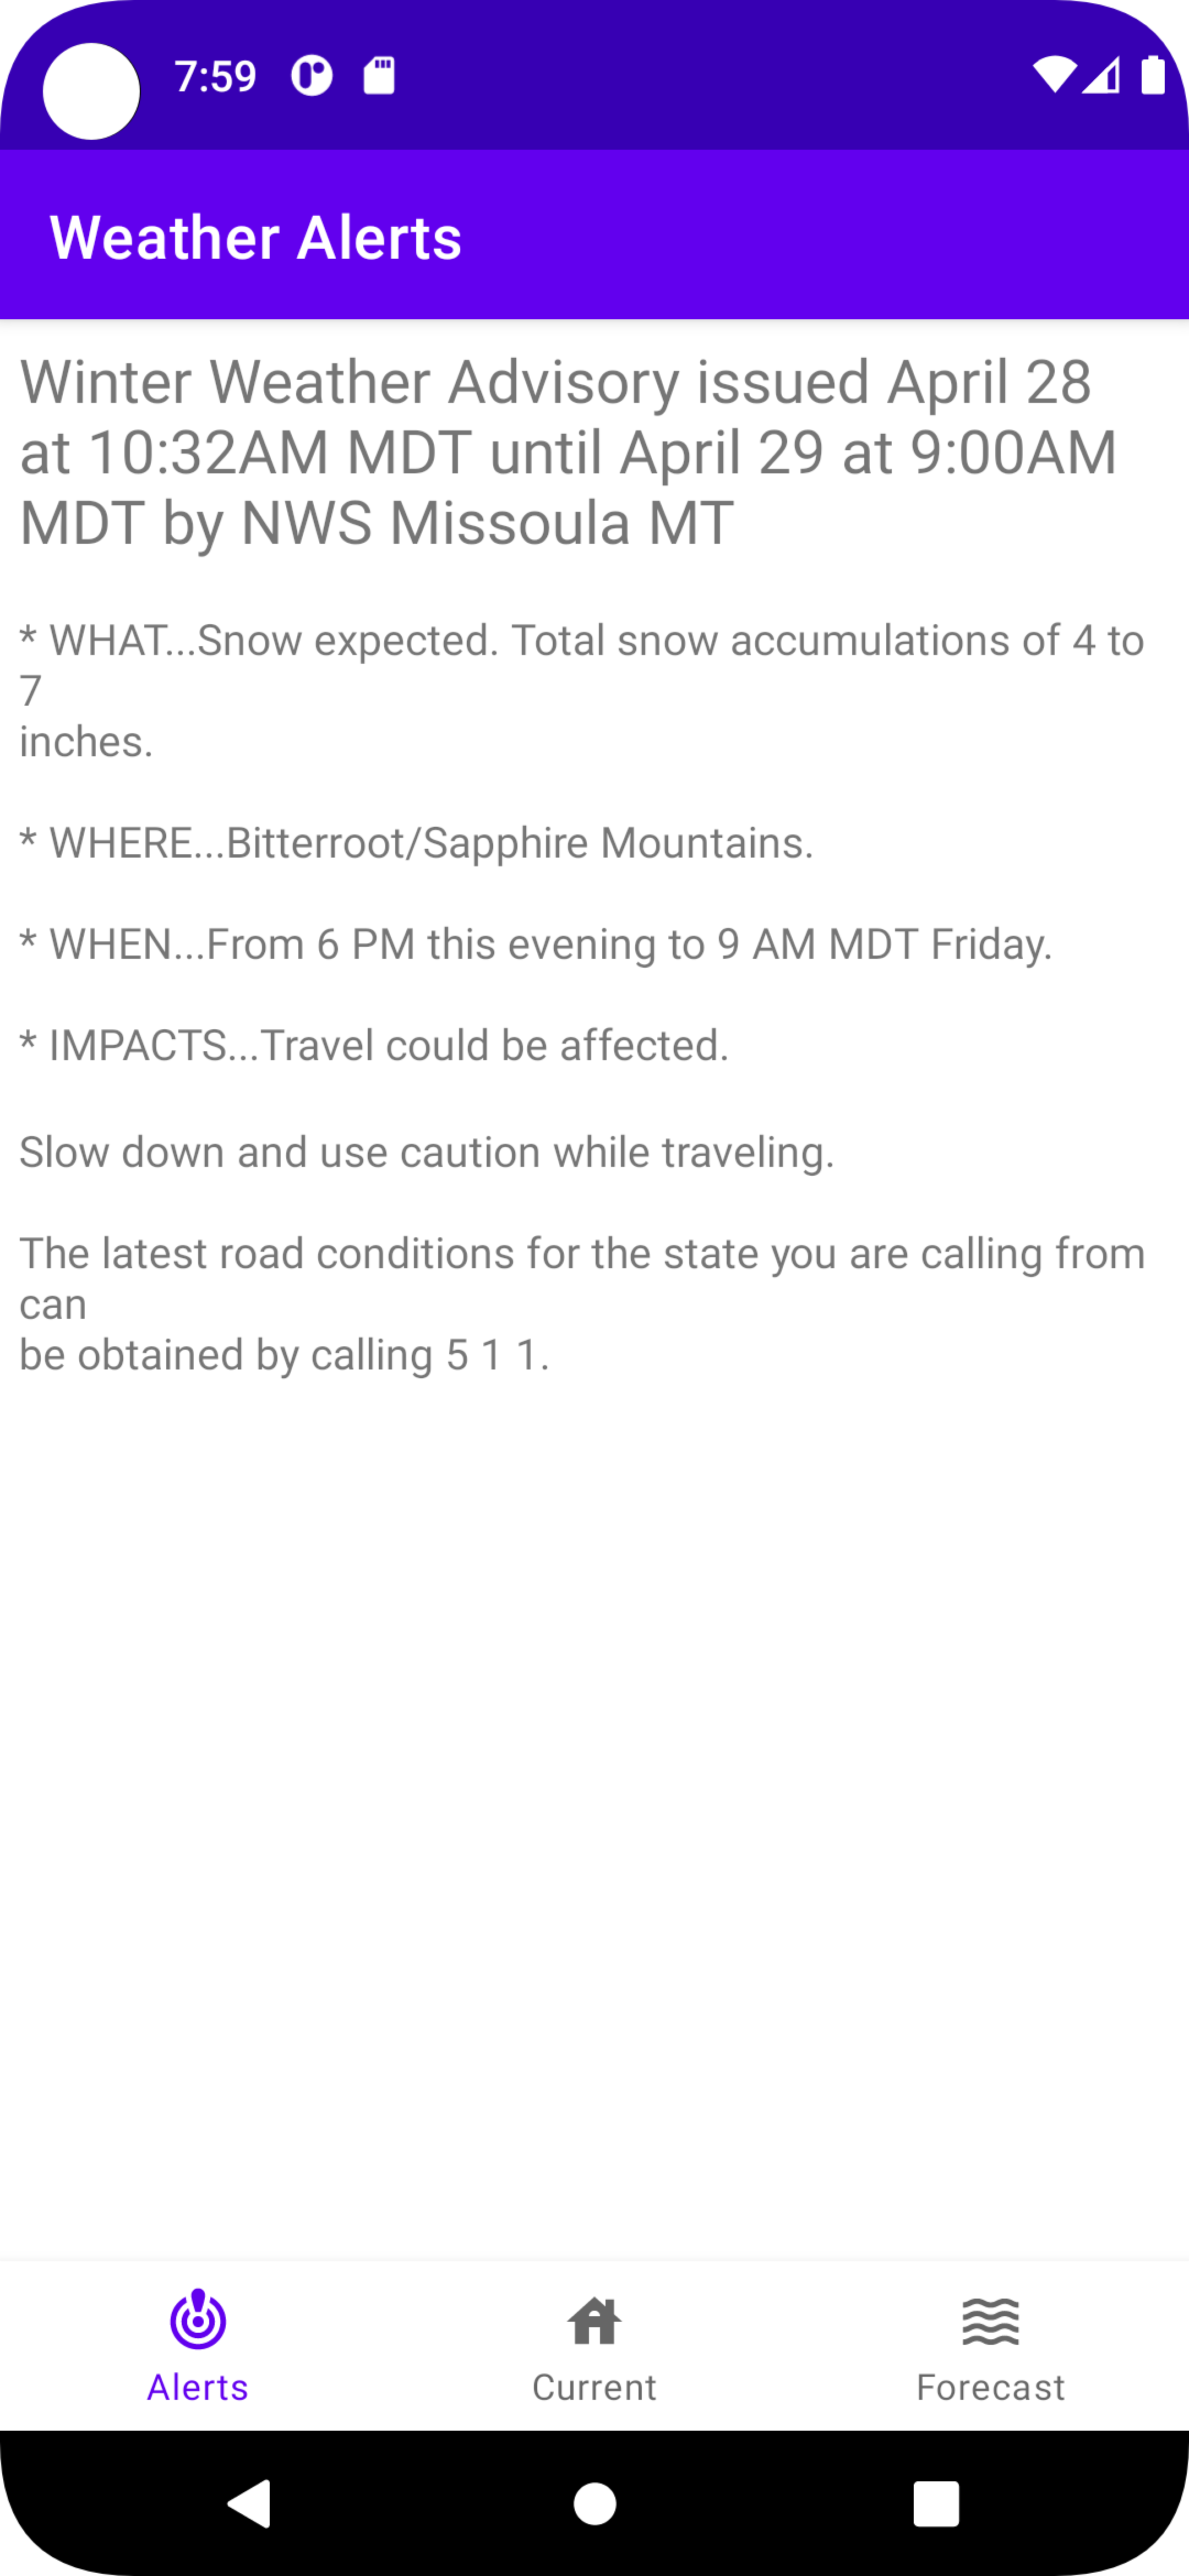
their users such as emails, videos, and in the example for this section, weather alerts.
Android
recommends
reforming this work on a background thread since network requests can take a significant
amount
of
time
to complete. Performing network requests on the main thread, also known as the UI
thread
in
Android because this is where UI information is processed, is not recommended. It is best
practice to
perform these
requests on a background thread in order to avoid the application appearing to freeze while
the
network
request
is handled. This situation is the basis of
asynchronous
programming.
Additionally, Android recommends segregating application code relating to network requests
within
its
own package, a practice which adheres to the
modular design technique. In
the
example
below,
we will explore how this can be accomplished using two open source libraries designed for
performing
API
requests and converting the returned JSON into a data class which can be passed in turn to a
ViewModel.
First, we implement our network layer as shown below:
-
First, we declare a reference to a
BASE_URLwhich will simplify our API calls. - Next, we create a Moshi object which will be used to deserialize the JSON we receive from the API endpoint into Kotlin data classes (we must still declare these classes; this will be demonstrated in the next section).
- Next, we must also define a RetroFit object responsible for converting the API HTTP response into an interface.
-
With our RetroFit object declared, we can now implement the interface which describes
our
API
call.
In this case, we perform an HTTP request to a particular endpoint that will return
weather
alerts
for
Missoula County, Montana. The interface describes what the API call will do: return an
Alert
object,
and the next step maps this HTTP request to a function
getAlerts()that can be called from within our application code, specifically ourViewModel. -
Lastly, we create an
Alertsobject which holds an immutable variable (val in Kotlin)retrofitServicedescribed by the interface above that will be lazily constructed (here lazy means that this process will not occur until theAlertsobject is first accessed).
private const val BASE_URL =
    "https://api.weather.gov/"

private val moshi = Moshi.Builder()
    .add(KotlinJsonAdapterFactory())
    .build()

private val retrofit = Retrofit.Builder()
    .addConverterFactory(MoshiConverterFactory.create(moshi))
    .baseUrl(BASE_URL)
    .build()

interface nwsAlerts {
    @GET("/alerts/active/zone/MTC063")
    suspend fun getALerts(): Alert
}

object Alerts {
    val retrofitService : nwsAlerts by lazy {
        retrofit.create(nwsAlerts::class.java)
    }
}
Now that our network layer has been implemented, let's look at the JSON data our request will return:
{
  "@context": [
    "https://geojson.org/geojson-ld/geojson-context.jsonld",
    {
      "@version": "1.1",
      "wx": "https://api.weather.gov/ontology#",
      "@vocab": "https://api.weather.gov/ontology#"
    }
  ],
  "type": "FeatureCollection",
  "features": [
  {
      "id": "https://api.weather.gov/alerts/urn:oid:2.49.0.1.840.0.aca7b95ba759466c3273df883d6e0473659ffa25.003.1",
      "type": "Feature",
      "geometry": null,
      "properties": {
        "@id": "https://api.weather.gov/alerts/urn:oid:2.49.0.1.840.0.aca7b95ba759466c3273df883d6e0473659ffa25.003.1",
        "@type": "wx:Alert",
        "id": "urn:oid:2.49.0.1.840.0.aca7b95ba759466c3273df883d6e0473659ffa25.003.1",
        "areaDesc": "Western Lemhi County; Eastern Lemhi County",
        "geocode": {
          "SAME": [
            "016059"
          ],
          "UGC": [
            "IDZ009",
            "IDZ010"
          ]
        },
        "affectedZones": [
          "https://api.weather.gov/zones/forecast/IDZ009",
          "https://api.weather.gov/zones/forecast/IDZ010"
        ],
        "references": [
          {
            "@id": "https://api.weather.gov/alerts/urn:oid:2.49.0.1.840.0.2e593b9f420cffc3e2c93e8268176059049b9048.002.1",
            "identifier": "urn:oid:2.49.0.1.840.0.2e593b9f420cffc3e2c93e8268176059049b9048.002.1",
            "sender": "[email protected]",
            "sent": "2022-04-28T10:32:00-06:00"
          },
          {
            "@id": "https://api.weather.gov/alerts/urn:oid:2.49.0.1.840.0.44104654e0ceaf0ae6560bb03ea5e3be76c3430e.003.1",
            "identifier": "urn:oid:2.49.0.1.840.0.44104654e0ceaf0ae6560bb03ea5e3be76c3430e.003.1",
            "sender": "[email protected]",
            "sent": "2022-04-29T02:51:00-06:00"
          }
        ],
        "sent": "2022-04-29T08:45:00-06:00",
        "effective": "2022-04-29T08:45:00-06:00",
        "onset": "2022-04-29T08:45:00-06:00",
        "expires": "2022-04-29T09:45:00-06:00",
        "ends": "2022-04-29T09:00:00-06:00",
        "status": "Actual",
        "messageType": "Update",
        "category": "Met",
        "severity": "Moderate",
        "certainty": "Likely",
        "urgency": "Expected",
        "event": "Winter Weather Advisory",
        "sender": "[email protected]",
        "senderName": "NWS Missoula MT",
        "headline": "Winter Weather Advisory issued April 29 at 8:45AM MDT until April 29 at 9:00AM MDT by NWS Missoula MT",
        "description": "Snow showers will continue today, but very minimal impacts are\nexpected, so the advisory will be allowed to expire at 9AM.",
        "instruction": null,
        "response": "Execute",
        "parameters": {
          "AWIPSidentifier": [
            "WSWMSO"
          ],
          "WMOidentifier": [
            "WWUS45 KMSO 291445"
          ],
          "NWSheadline": [
            "WINTER WEATHER ADVISORY WILL EXPIRE AT 9 AM MDT THIS MORNING ABOVE 4500 FEET"
          ],
          "BLOCKCHANNEL": [
            "EAS",
            "NWEM",
            "CMAS"
          ],
          "VTEC": [
            "/O.EXP.KMSO.WW.Y.0029.000000T0000Z-220429T1500Z/"
          ],
          "eventEndingTime": [
            "2022-04-29T15:00:00+00:00"
          ]
        }
      }
    },
There is a lot of information here, but we are only concerned with a few objects in the
properties
array. Regardless, we must create data classes that the JSON response can be mapped to:
data class Alert (
    @Json(name = "@context") val context: List,
    val type: String,
    val features: List,
    val title: String,
    val updated: String
    )

data class AlertFeature(
    val id: String,
    val type: String,
    val geometry: String?,
    val properties: AlertProperties,
)

data class AlertProperties(
    @Json(name = "@id") val fullId: String,
    @Json(name = "@type") val type: String,
    val id: String,
    val areaDesc: String,
    val geocode: Geocode,
    val affectedZones: List,
    val references: List,
    val sent: String,
    val effective: String,
    val onset: String,
    val expires: String,
    val ends: String,
    val status: String,
    val messageType: String,
    val category: String,
    val severity: String,
    val certainty: String,
    val urgency: String,
    val event: String,
    val sender: String,
    val senderName: String,
    val headline: String,
    val description: String,
    val instruction: String,
    val response: String,
    val parameters: Parameter
)

data class Geocode(
    val SAME: List,
    val UGC: List
)

data class Reference(
    @Json(name = "@id") val id: String,
    val identifier: String,
    val sender: String,
    val sent: String
)

data class Parameter(
    val AWIPSidentifier: List,
    val WMOidentifier: List,
    val BLOCKCHANNEL: List,
    //@Json(name = "EAS-ORG") val EASORG: List,
    val VTEC: List,
    val eventEndingTime: List,
    //val expiredReferences: List
)
Now that we have created classes (for each JSON array) and fields (for each JSON object), we can begin to work with the data returned by the API:
-
We can declare an
enumclass that contains the three possible states of our network request:LOADING, ERROR, DONE. - We declare fields (using the backing property described in the previous section) to hold the value of both the network request status and the API response.
-
The function
getAlerts()launches acoroutine(discussed below) that will avoid making any asynchronous requests on the main UI thread. -
If the request is successful, we can access the
Alertobject via ourAlertViewModel. - If any errors occur, the UI will display an error icon and we can examine application logs in order to troubleshoot.
class AlertViewModel : ViewModel() {

    enum class AlertStatus { LOADING, ERROR, DONE }

    private val _status = MutableLiveData()
    val status: LiveData = _status

    private val _alerts = MutableLiveData()
    val alerts: LiveData = _alerts

    /**
     * Call getAlerts() on init so we can display status immediately.
     */
    init {
        getAlerts()
    }

    private fun getAlerts() {
        viewModelScope.launch {
            _status.value = AlertStatus.LOADING
            try {
                _alerts.value = Alerts.retrofitService.getALerts()
                _status.value = AlertStatus.DONE
            } catch (e: Exception) {
                Log.e("Alert", e.toString())
                _status.value = AlertStatus.ERROR
                _alerts.value = Alert(context = listOf(),
                type = "ERROR", features = listOf(), title = "ERROR",
                updated = "ERROR")
            }
        }
    }
}
We performed our network request on a background thread by launching a coroutine from the ViewModel Scope. This ensures that no matter how long the request takes to complete, our UI will not appear to freeze.
Next, it is necessary to define two binding adapters that describe how the data stored in
AlertViewModel will be displayed:
-
The first binding adapter allows us to bind an appropriate image resource file
(either a loading icon or an error icon) to an
ImageViewin ouralert_fragment.xmllayout file shown below: -
The second binding adapter defines how the
Alertdata we are interested in will be passed to theRecyclerView. For this, we need to create anAlertAdapterclass and also define analert_item.xmllayout file, which will be shown below.
@BindingAdapter("nwsAlertStatus")
fun bindAlertStatus(statusImageView: ImageView, status: AlertViewModel.AlertStatus) {
    when (status) {
        AlertViewModel.AlertStatus.LOADING -> {
            statusImageView.visibility = View.VISIBLE
            statusImageView.setImageResource(R.drawable.loading_animation)
        }
        AlertViewModel.AlertStatus.ERROR -> {
            statusImageView.visibility = View.VISIBLE
            statusImageView.setImageResource(R.drawable.ic_connection_error)
        }
        AlertViewModel.AlertStatus.DONE -> {
            statusImageView.visibility = View.GONE
        }
    }
}

@BindingAdapter("alertListData")
fun bindRecyclerView(recyclerView: RecyclerView,
                     data: List?) {
    val adapter = recyclerView.adapter as AlertAdapter
    adapter.submitList(data)
}
AlertAdapter
class AlertAdapter :
    androidx.recyclerview.widget.ListAdapter(DiffCallback){


    class AlertViewHolder(private var binding: AlertItemBinding) :
        RecyclerView.ViewHolder(binding.root) {
        fun bind(alert: AlertFeature) {
            binding.alertHeadline.text = alert.properties.headline
            binding.alertDescription.text = alert.properties.description
            binding.alertInstructions.text = alert.properties.instruction
            binding.executePendingBindings()
        }
    }

    companion object DiffCallback : DiffUtil.ItemCallback() {
        override fun areItemsTheSame(oldItem: AlertFeature, newItem: AlertFeature): Boolean {
            return oldItem.id == newItem.id
        }

        override fun areContentsTheSame(oldItem: AlertFeature, newItem: AlertFeature): Boolean {
            return oldItem.properties == newItem.properties
        }
    }

    override fun onCreateViewHolder(parent: ViewGroup, viewType: Int): AlertViewHolder {
        return AlertViewHolder(AlertItemBinding.inflate(LayoutInflater.from(parent.context)))
    }

    override fun onBindViewHolder(holder: AlertViewHolder, position: Int) {
        val alert = getItem(position)
        holder.bind(alert)
    }
}
alert_item.xml
With everything implemented, we can run our application and observe the result:
What I've Learned: Persisting user data using the Room library
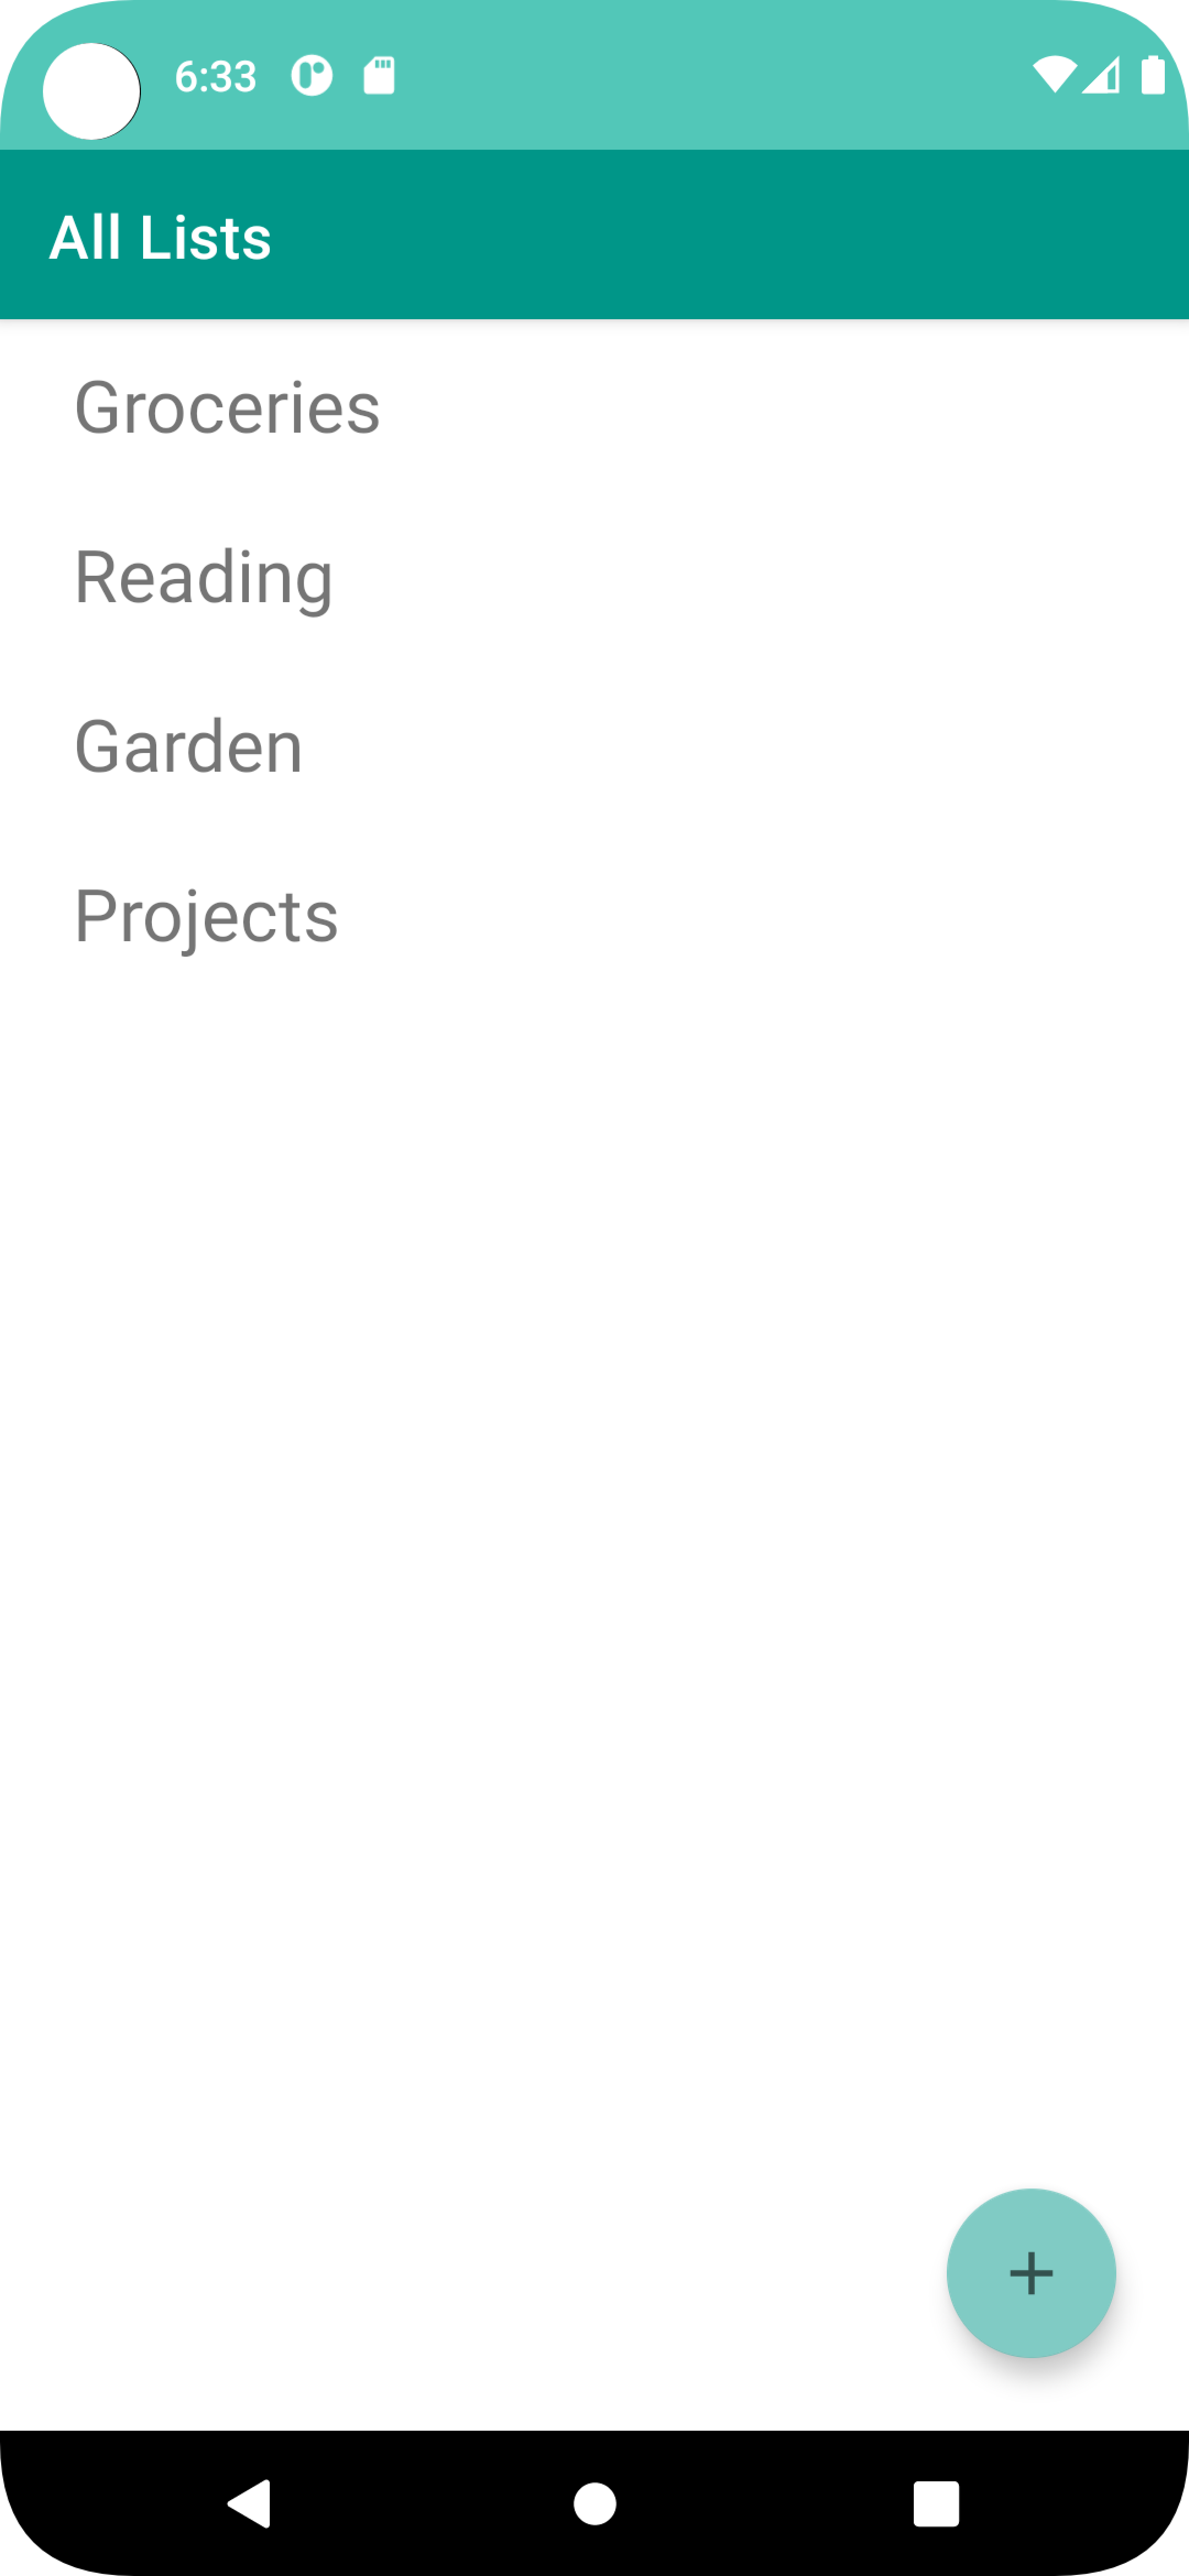
Many applications receive and store information from their users. Oftentimes, this is done so that a user can return to the application at a later time and retrieve this data. In this section, we will explore how the Android Jetpack Room library can be used to accomplish this. This section demonstrates how a simple list application or note-taking application can be created. This application allows users to create a list of main items where each main item can be considered a task category. Clicking on a main item navigates to a list of items grouped as children of the main item. For example, a main item 'grocery' may be clicked to display a list of grocery items such as 'milk', 'eggs', and 'cheese'. This app is my original work and is available on the Google Play Store.
First, we must define a Data Entity, which describes a database table using SQL
conventions:
-
The
MainItemdata class will be used to create a table containing main items and contains only two columns: a unique id identifying the main item and the main item's name. -
The
DetailItemdata class will be used to create a table containing detail items and contains two columns: a reference to the parent main item and the detail item name. These columns are combined to form a primary key, in case a detail item appears within multiple main item categories.
@Entity
data class MainItem(
    @PrimaryKey(autoGenerate = true)
    val id: Int = 0,
    @ColumnInfo(name = "item_name") val itemName: String?
)

@Entity(primaryKeys = ["main_item_id", "detail_item_name"])
data class DetailItem(
    @NonNull @ColumnInfo(name = "main_item_id") val mainItemId: Int,
    @NonNull @ColumnInfo(name = "detail_item_name") val detailItemName: String
)
Next, we declare a Data Access Object (DAO), which is just an interface describing
what
operations can be performed on a database table and what this operation will return. The Room
library
provides three DAO operations anytime a DAO is declared: insert, delete and update. All other
table
operations must be explicitly defined:
-
The
getAll()function corresponds to a SQL query that will return all main items sorted in the order that they were added to the list. -
The
getById()function corresponds to a SQL query that will return the item matching the id passed to the function as an argument. This will be useful when adding click listeners to each main item in order to define navigation to their detail item list. -
The
findByName()function isn't currently used in this application, but I defined it because I would like to add search functionality in the future. -
The
deleteDetailsFromMain()function will delete all detail items should their parent main item be deleted by the user. -
The
insert()function has been modified such that if a main item exists already, a duplicate will be ignored. - Notice that when function return types are specified above they are wrapped in a Flow type which allows for these values to be continuously updated.
@Dao
interface MainItemDao {
    @Query("SELECT * FROM MainItem ORDER BY id ASC")
    fun getAll(): Flow<List<MainItem>>

    @Query("SELECT * FROM MainItem WHERE id = :itemId")
    fun getById(itemId: Int): Flow<MainItem>

    @Query("SELECT * FROM MainItem WHERE item_name LIKE :name")
    fun findByName(name: String): Flow<List<MainItem>>

    @Query(" DELETE FROM detailitem where main_item_id = :mainItemId")
    fun deleteDetailsFromMain(mainItemId: Int)

    @Insert(onConflict = OnConflictStrategy.IGNORE)
    fun insert(item: MainItem)

    @Delete
    fun delete(item: MainItem)

    @Update
    fun update(item: MainItem)
}
Next we define an AppDatabase class that serves as the application's entry point in
accessing the persisted data:
-
The
AppDatabaseclass must be annotated with@Databaseand provide an entities array naming each data entity we have defined above. - Optionally, a version number may be provided; this is essential if changes have been made to the database architecture; each change necessitates incrementing the version number by one.
-
The
AppDatabaseclass extends theRoomDataBasebase class and contains methods corresponding to each DAO that has been implemented. -
The companion object (along with the
BaseApplicationclass described below) ensures that only one instance of theAppDatabaseclass is available while the application is running.
@Database(entities = [MainItem::class, DetailItem::class], version = 2)
abstract class AppDatabase : RoomDatabase() {
    abstract fun mainItemDao(): MainItemDao
    abstract fun detailItemDao(): DetailItemDao
    companion object {
        @Volatile
        private var INSTANCE: AppDatabase? = null
        fun getDatabase(context: Context): AppDatabase{
            return INSTANCE ?: synchronized(this) {
                val instance = Room.databaseBuilder(
                    context.applicationContext,
                    AppDatabase::class.java,
                    "List Item Database"
                )
                    .fallbackToDestructiveMigration()
                    .build()
                INSTANCE = instance
                return instance
            }
        }
    }
}
We are almost done with our Room specific implementations!
It is necessary to create a class BaseApplication so as to ensure
our app accesses our database as a singleton instance:
class BaseApplication : Application() {
    val database: AppDatabase by lazy { AppDatabase.getDatabase(this) }
}
And now we must modify our application manifest AndroidManifest.xml so that the
application
launches from the BaseApplication class that we just created:
Now that we have finished implementing the necessary components to use the Room library in our
application,
we can define our ListViewModel class to contain the logic for accessing the DAOs
and
modifying our database tables:
class ListViewModel(
    private val mainItemDao: MainItemDao,
    private val detailItemDao: DetailItemDao
): ViewModel() {
    val allMainItems: LiveData> = mainItemDao.getAll().asLiveData()

    fun getDetailItems(mainItemId: Int) : LiveData> {
        return detailItemDao.getDetailFromMain(mainItemId).asLiveData()
    }

    fun addMainItem(mainItem: MainItem) {
        // launch a coroutine and call the DAO method to add a MainItem to the database
        viewModelScope.launch(Dispatchers.IO) {
            mainItemDao.insert(mainItem)
        }
    }

    fun addDetailItem(mainItemId: Int, detailItemName: String) {
        val detailItem = DetailItem(mainItemId = mainItemId, detailItemName = detailItemName)

        // launch a coroutine and call the DAO method to add a DetailItem to the database
        viewModelScope.launch(Dispatchers.IO) {
            detailItemDao.insert(detailItem)
        }
    }

    fun deleteMainItem(mainItem: MainItem) {
        // call the DAO method to delete a MainItem
        viewModelScope.launch(Dispatchers.IO) {
            mainItemDao.delete(mainItem)
        }
    }

    fun deleteDetailItem(detailItem: DetailItem) {
        // call the DAO method to delete a DetailItem
        viewModelScope.launch(Dispatchers.IO) {
            detailItemDao.delete(detailItem)
        }
    }

    fun deleteDetailsFromMain(mainItemId: Int) {
        // call the DAO method to delete all DetailItems belonging to a MainItem
        viewModelScope.launch(Dispatchers.IO) {
            mainItemDao.deleteDetailsFromMain(mainItemId)
        }
    }

    // create a view model factory that takes a MainItemDao and DetailItemDao as properties  and
    // creates a ViewModel
    class ListViewModelFactory(
        private val mainItemDao: MainItemDao,
        private val detailItemDao: DetailItemDao
        ):
        ViewModelProvider.Factory{
        override fun  create(modelClass: Class): T {
            if (modelClass.isAssignableFrom(ListViewModel::class.java)) {
                return ListViewModel(mainItemDao, detailItemDao) as T
            }
            throw IllegalArgumentException("Unknown ViewModel class")
        }
    }
Since we are displaying a list of MainItem and DetailItem in their
respective
fragments, we must implement adapter classes for both lists:
MainAdapter
class MainAdapter(
    private val onItemClick: (MainItem) -> Unit, private val onItemLongClick: (MainItem) -> Boolean
) : ListAdapter(DiffCallback) {

    companion object DiffCallback : DiffUtil.ItemCallback() {
        override fun areItemsTheSame(oldItem: MainItem, newItem: MainItem): Boolean {
            return oldItem.itemName == newItem.itemName
        }

        override fun areContentsTheSame(oldItem: MainItem, newItem: MainItem): Boolean {
            return oldItem == newItem
        }

    }

    class ViewHolder(private var binding: ListItemBinding) : RecyclerView.ViewHolder(binding.root) {
        fun bind(item: MainItem) {
            binding.listItemText.text = item.itemName.toString()
        }
    }

    override fun onCreateViewHolder(parent: ViewGroup, viewType: Int): ViewHolder {
        val viewHolder = ViewHolder(
            ListItemBinding.inflate(
                LayoutInflater.from(parent.context),
                parent,
                false
            )
        )
        viewHolder.itemView.setOnClickListener {
            val position = viewHolder.adapterPosition
            onItemClick(getItem(position))
        }
        viewHolder.itemView.setOnLongClickListener {
            val position = viewHolder.adapterPosition
            onItemLongClick(getItem(position))
        }
        return viewHolder
    }

    override fun onBindViewHolder(holder: ViewHolder, position: Int) {
        holder.bind(getItem(position))
    }
}
DetailAdapter
class DetailAdapter(
    private val onItemLongClick: (DetailItem) -> Boolean
) : ListAdapter(DiffCallback) {

    companion object DiffCallback : DiffUtil.ItemCallback() {
        override fun areItemsTheSame(oldItem: DetailItem, newItem: DetailItem): Boolean {
            return oldItem == newItem
        }

        override fun areContentsTheSame(oldItem: DetailItem, newItem: DetailItem): Boolean {
            return oldItem == newItem
        }
    }

    class ViewHolder(private var binding: ListItemBinding) : RecyclerView.ViewHolder(binding.root) {
        fun bind(item: DetailItem) {
            binding.listItemText.text = item.detailItemName
        }
    }

    override fun onCreateViewHolder(parent: ViewGroup, viewType: Int): ViewHolder {
        val viewHolder = ViewHolder(
            ListItemBinding.inflate(
                LayoutInflater.from(parent.context),
                parent,
                false
            )
        )
        viewHolder.itemView.setOnLongClickListener {
            val position = viewHolder.adapterPosition
            onItemLongClick(getItem(position))
        }
        return viewHolder
    }

    override fun onBindViewHolder(holder: ViewHolder, position: Int) {
        holder.bind(getItem(position))
    }
}
The last step in our application is to define click listeners, navigation actions and some additional UI components (Alert Dialogs to confirm the deletion of existing items and receive text necessary to create new items) that will work together to perform the expected behavior of our app:
MainListFragment
class MainListFragment : Fragment() {
    private val viewModel: ListViewModel by activityViewModels {
        ListViewModel.ListViewModelFactory(
            (activity?.application as BaseApplication).database.mainItemDao(),
            (activity?.application as BaseApplication).database.detailItemDao(),
        )
    }
    private var _binding: FragmentMainListBinding? = null
    private val binding get() = _binding!!

    override fun onCreateView(
        inflater: LayoutInflater, container: ViewGroup?,
        savedInstanceState: Bundle?
    ): View {
        _binding = FragmentMainListBinding.inflate(inflater, container, false)
        return binding.root
    }

    override fun onViewCreated(view: View, savedInstanceState: Bundle?) {
        super.onViewCreated(view, savedInstanceState)
        // Add click listener to floating action button
        binding.fabMain.setOnClickListener {
            addListItem()
        }
        val recyclerView = binding.mainListView
        recyclerView.layoutManager = LinearLayoutManager(requireContext())

        // lambda for click behavior
        // navigate to appropriate detail list
        val click = { mainItem: MainItem ->
            val action =
                MainListFragmentDirections.actionMainListFragmentToDetailListFragment(mainItem.id, mainItem.itemName!!)
            findNavController().navigate(action)
        }

        // lambda for long click behavior
        // delete longclicked item
        val longClick = { item: MainItem ->
            deleteListItem(item)
        }

        // MainAdapter takes params onClickListener and onLongClickListener
        val adapter = MainAdapter(click, longClick)
        recyclerView.adapter = adapter
        viewModel.allMainItems.observe(this.viewLifecycleOwner) { items ->
            items.let {
                adapter.submitList(it)
                adapter.notifyDataSetChanged()
            }
        }
    }

    private fun addListItem() {
        val input = EditText(activity)
        input.hint = "Item name"
        input.inputType = InputType.TYPE_CLASS_TEXT
        activity?.let {
            val builder = AlertDialog.Builder(activity)
            builder.apply {
                setTitle("Add List Item")
                setView(input)
                setPositiveButton(
                    "Add"
                ) { _, _ ->
                    val newItem = MainItem(itemName = input.text.toString())
                    viewModel.addMainItem(newItem)
                }
                setNegativeButton(
                    "Cancel"
                ) { dialog, _ ->
                    dialog.cancel()
                }
            }
            builder.create()
            builder.show()
        }
    }

    private fun deleteListItem(item: MainItem): Boolean {
        activity?.let {
            val builder = AlertDialog.Builder(activity)
            builder.apply {
                setTitle("Delete ${item.itemName}?")
                setPositiveButton(
                    "Yes"
                ) { _, _ ->
                    viewModel.deleteMainItem(item)
                    viewModel.deleteDetailsFromMain(item.id)
                }
                setNegativeButton(
                    "Cancel"
                ) { dialog, _ ->
                    dialog.cancel()
                }
            }
            builder.create()
            builder.show()
        }
        return true
    }
}
DetailListFragment
class DetailListFragment : Fragment() {
    private val viewModel: ListViewModel by activityViewModels {
        ListViewModel.ListViewModelFactory(
            (activity?.application as BaseApplication).database.mainItemDao(),
            (activity?.application as BaseApplication).database.detailItemDao(),
            )
    }
    private var _binding: FragmentDetailListBinding? = null
    private val binding get() = _binding!!
    private lateinit var adapter: DetailAdapter
    private val args: DetailListFragmentArgs by navArgs()

    override fun onCreateView(
        inflater: LayoutInflater, container: ViewGroup?,
        savedInstanceState: Bundle?
    ): View? {
        _binding = FragmentDetailListBinding.inflate(inflater, container, false)
        return binding.root
    }

    override fun onViewCreated(view: View, savedInstanceState: Bundle?) {
        super.onViewCreated(view, savedInstanceState)
        // Add click listener to floating action button
        binding.fabMain.setOnClickListener {
            addListItem()
        }
        val recyclerView = binding.detailListView
        recyclerView.layoutManager = LinearLayoutManager(requireContext())

        // lambda to define longClick behavior
        val longClick = { detailItem: DetailItem ->
            deleteListItem(detailItem)
        }
        adapter = DetailAdapter(longClick)
        recyclerView.adapter = adapter
        viewModel.getDetailItems(args.mainItemId).observe(this.viewLifecycleOwner) { items ->
            items.let {
                adapter.submitList(it)
                adapter.notifyDataSetChanged()
            }
        }
    }

    private fun addListItem() {
        val input = EditText(activity)
        input.hint = "Item name"
        input.inputType = InputType.TYPE_CLASS_TEXT
        activity?.let {
            val builder = AlertDialog.Builder(activity)
            builder.apply {
                setTitle("Add List Item")
                setView(input)
                setPositiveButton(
                    "Add"
                ) { _, _ ->
                    viewModel.addDetailItem(args.mainItemId, input.text.toString())
                }
                setNegativeButton(
                    "Cancel"
                ) { dialog, _ ->
                    dialog.cancel()
                }
            }
            builder.create()
            builder.show()
        }
    }

    private fun deleteListItem(detailItem: DetailItem): Boolean {
        activity?.let {
            val builder = AlertDialog.Builder(activity)
            builder.apply {
                setTitle("Delete ${detailItem.detailItemName}?")
                setPositiveButton(
                    "Yes"
                ) { _, _ ->
                    viewModel.deleteDetailItem(detailItem)
                    Log.d("deletion", "id was $detailItem")
                }
                setNegativeButton(
                    "Cancel"
                ) { dialog, _ ->
                    dialog.cancel()
                }
            }
            builder.create()
            builder.show()
        }
        return true
    }
}
Application Demonstration:
See the link at the bottom of this page to install this application onto your own device.
.

Top Accomplishments:
Exploring mobile application development has been extremely worthwhile, and I would reccomend it to any CS student or anyone with an interest in programming. I have learned a lot about software architecture, testing and design. I have been introduced to software design patterns and situations in which they are useful. Additionally, learning Kotlin gave me a better appreciation for object-oriented languages and why they are so commonly used when developing applications. Before exploring mobile application development, I understood what interfaces and inherited classes were but wasn't sure when to use one over the other. In summary, developing mobile applications has allowed me to put into practice the computer science fundamentals I had a previous academic understanding of but in a more practical, real-world way.
What would I do differently?
I knew from past learning experiences that I would learn best by completing projects with minimal guidance as opposed to watching videos, reading documentation or working through tutorials. For this reason, I wanted to develop my own applications as soon as possible. I attempted a few applications guided only by my own intuition and my experience as a computer science student. These applications did not go very far, and I soon realized I needed to complete some formalized training. The Android Basics in Kotlin Course offered by Android was perfect. It consisted of six modules, and each module took about two weeks to complete. After finishing the training, I had a very good understanding of the basic components of building well designed, useful and appealing applications. I wish I had completed this course sooner.